

Simply follow the steps described below:
Step by step guide:
I. Get the Account ID
To get your NetSuite Account ID, go to Setup > Company > Company Information
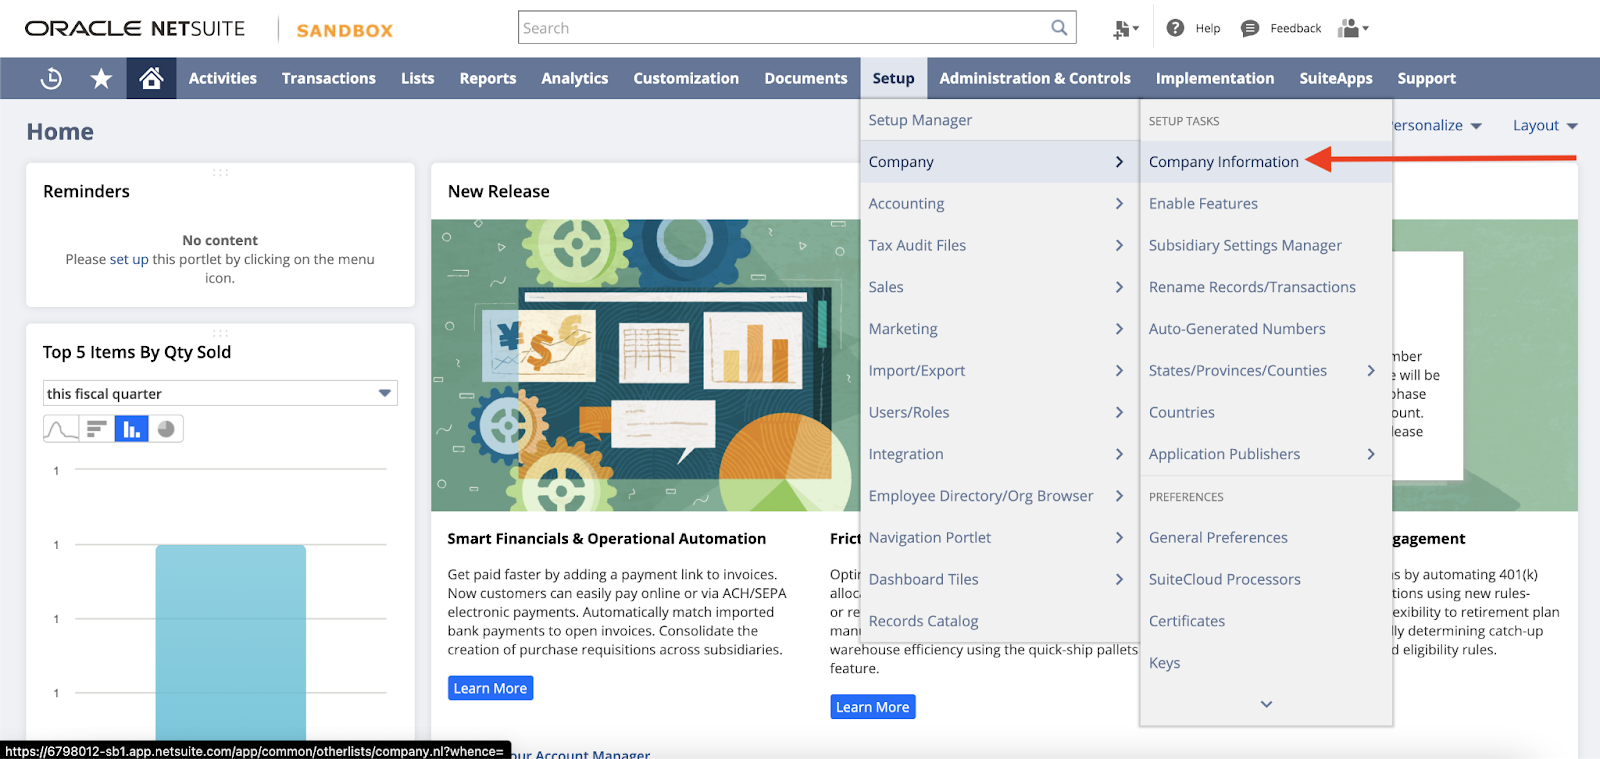
Setup > Company > Company Information
On the Company Information page, you will see the ACCOUNT ID label on the right side. Save the number, but leave off the trailing _SB1
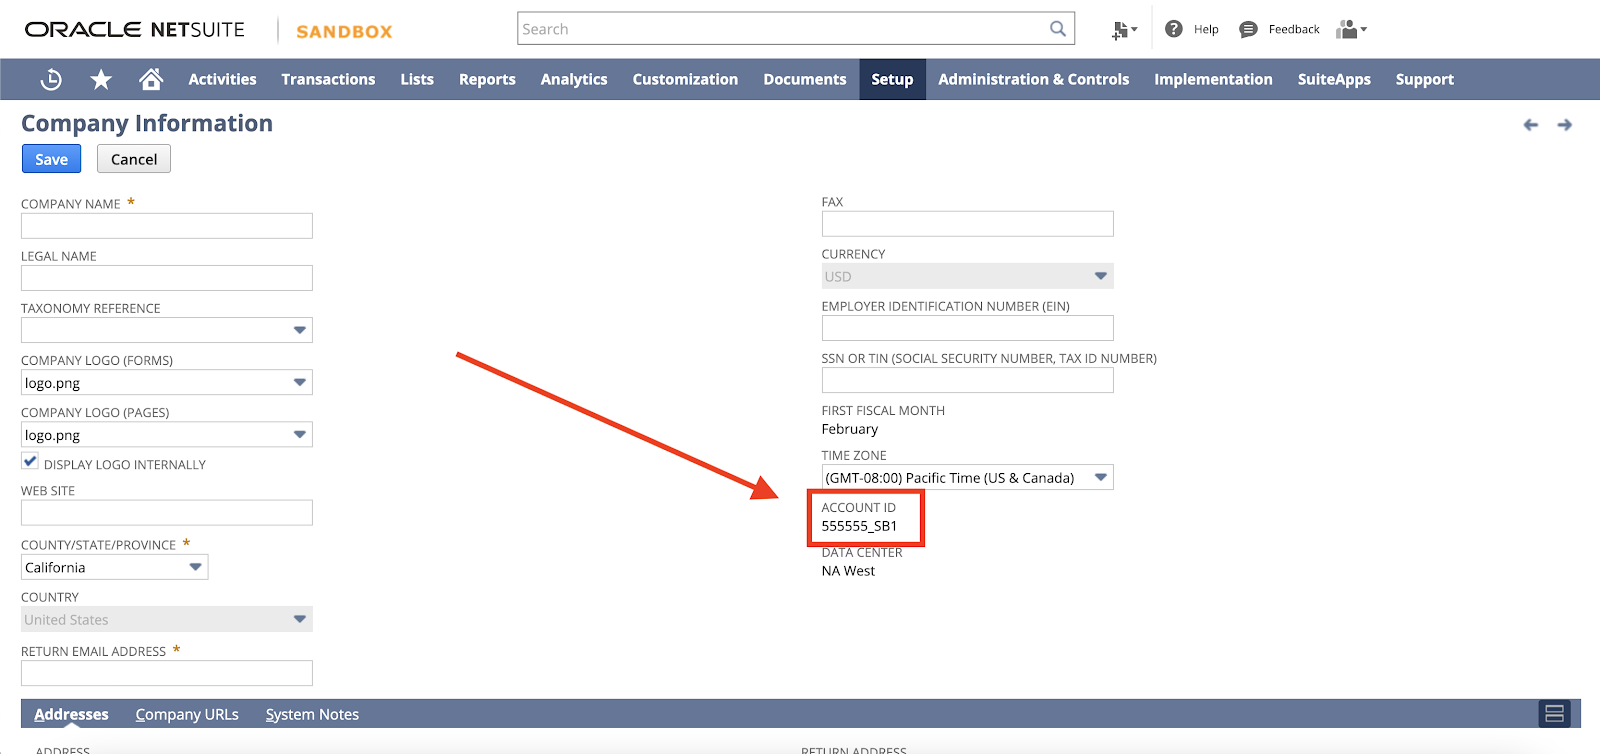
NetSuite Company Information Page
For the example above, our Account ID is 555555
II. Get the Consumer Key/Secret Pair
To create a Consumer Key/Secret Pair we will need to create an Integration Record
Head to Setup > Integrations > Manage Integrations
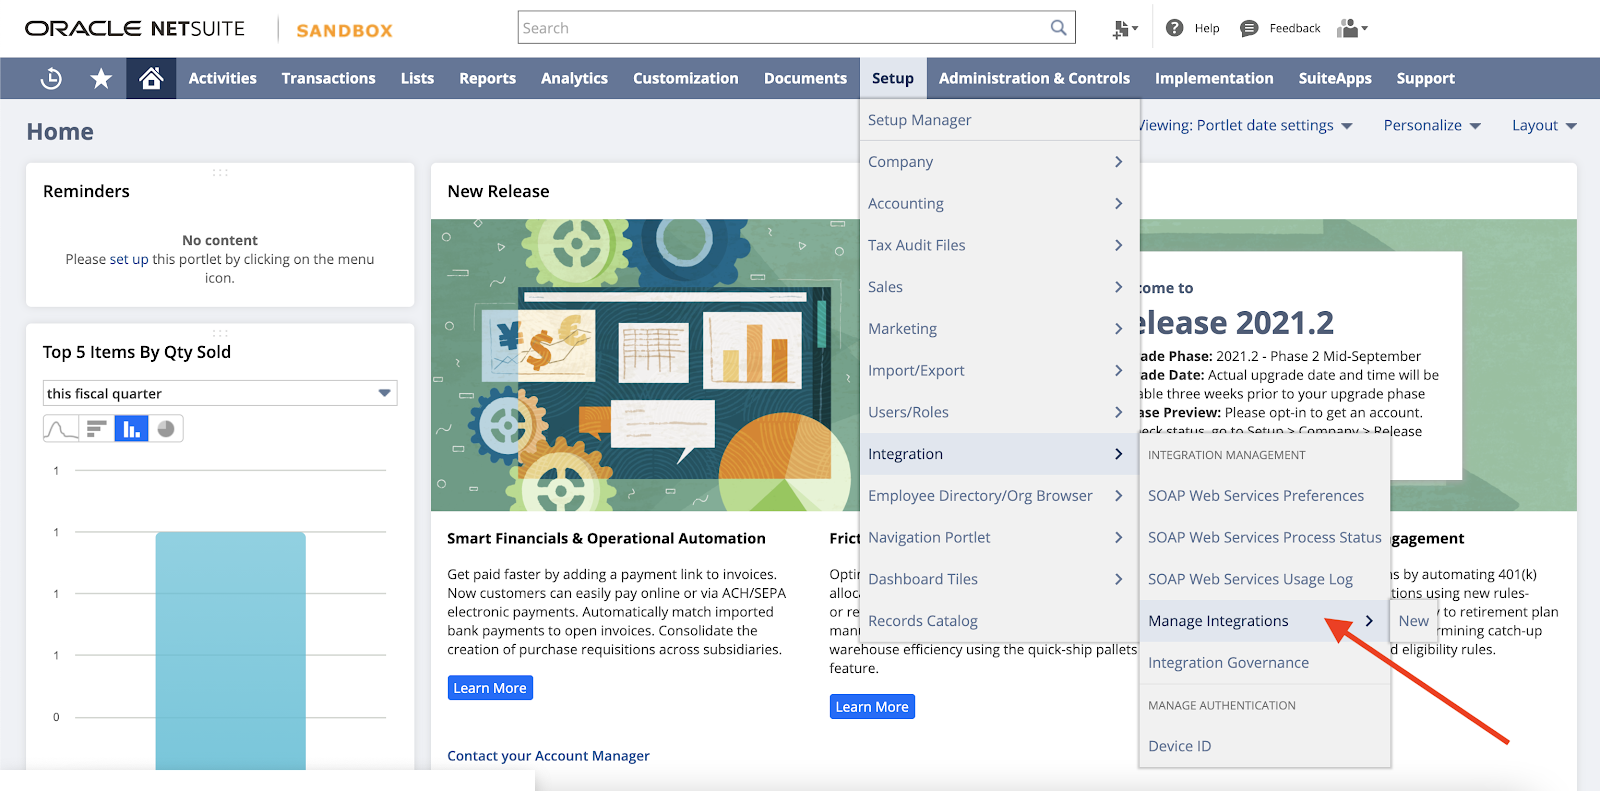
Setup > Integrations > Manage Integrations
Once you're on the Manage Integrations page, press New
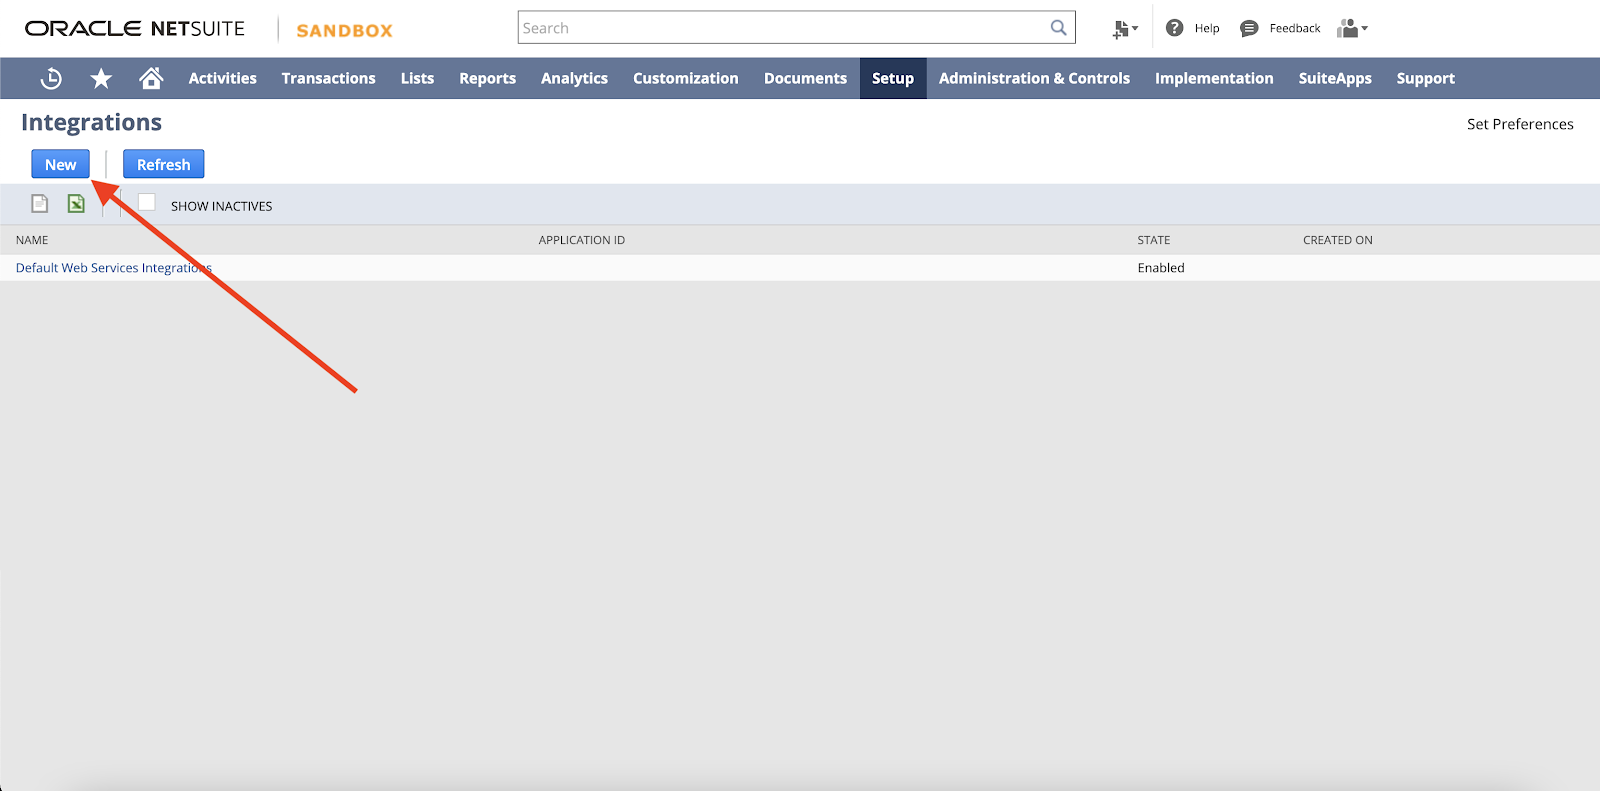
Create new Integration Record
On the new integration record page:
- choose a name for your integration
- check the Token-Based Authentication option
- check the "TBA: ISSUETOKEN ENDPOINT" option
- uncheck the "TBA: AUTHORIZATION FLOW" option
- uncheck the "AUTHORIZATION CODE GRANT" option
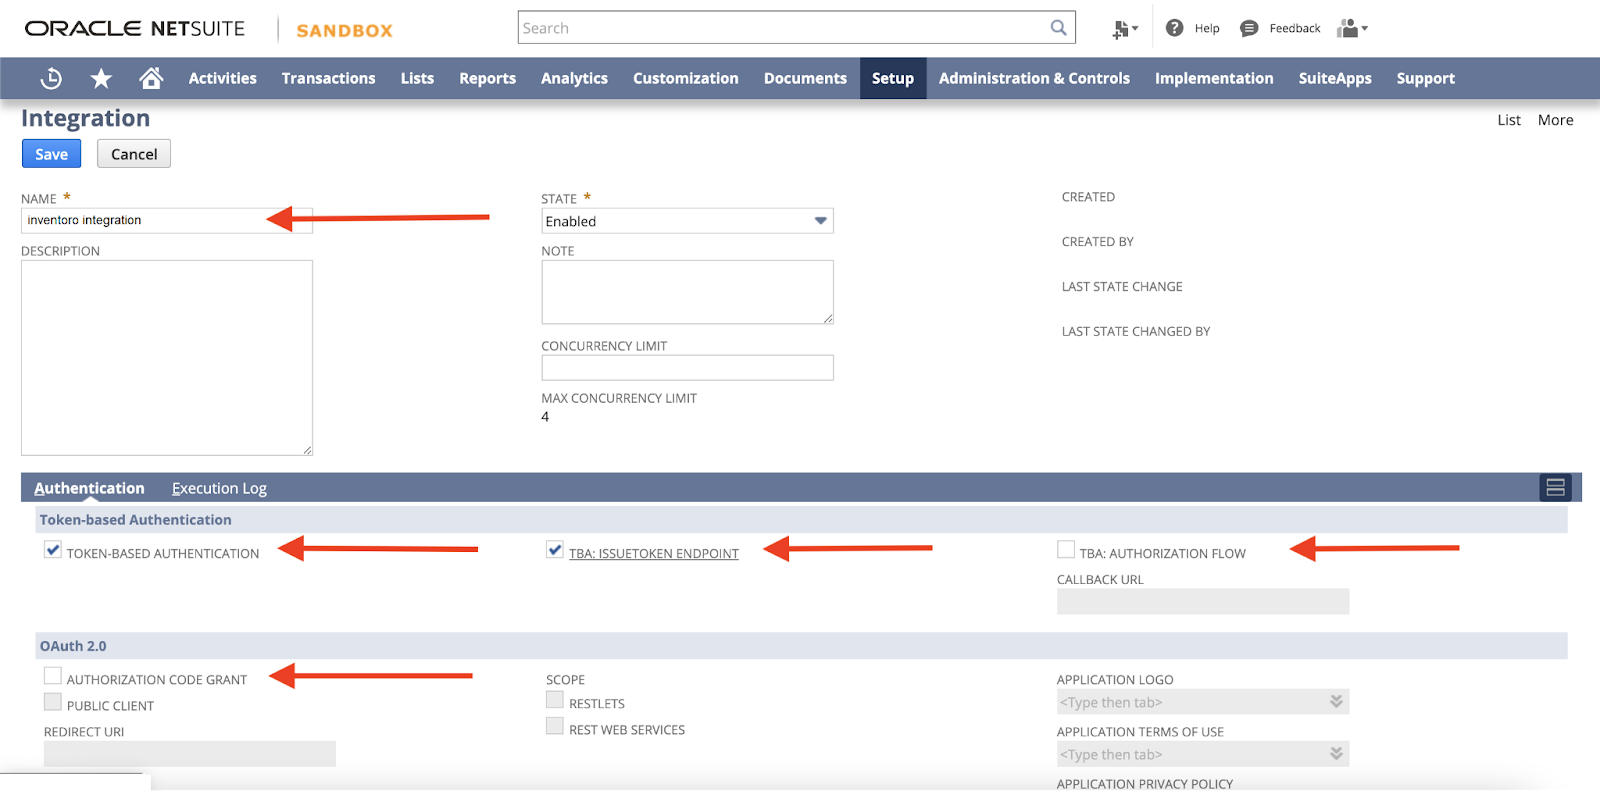
Configured Integration Record
Make sure your settings match the above, and press Save
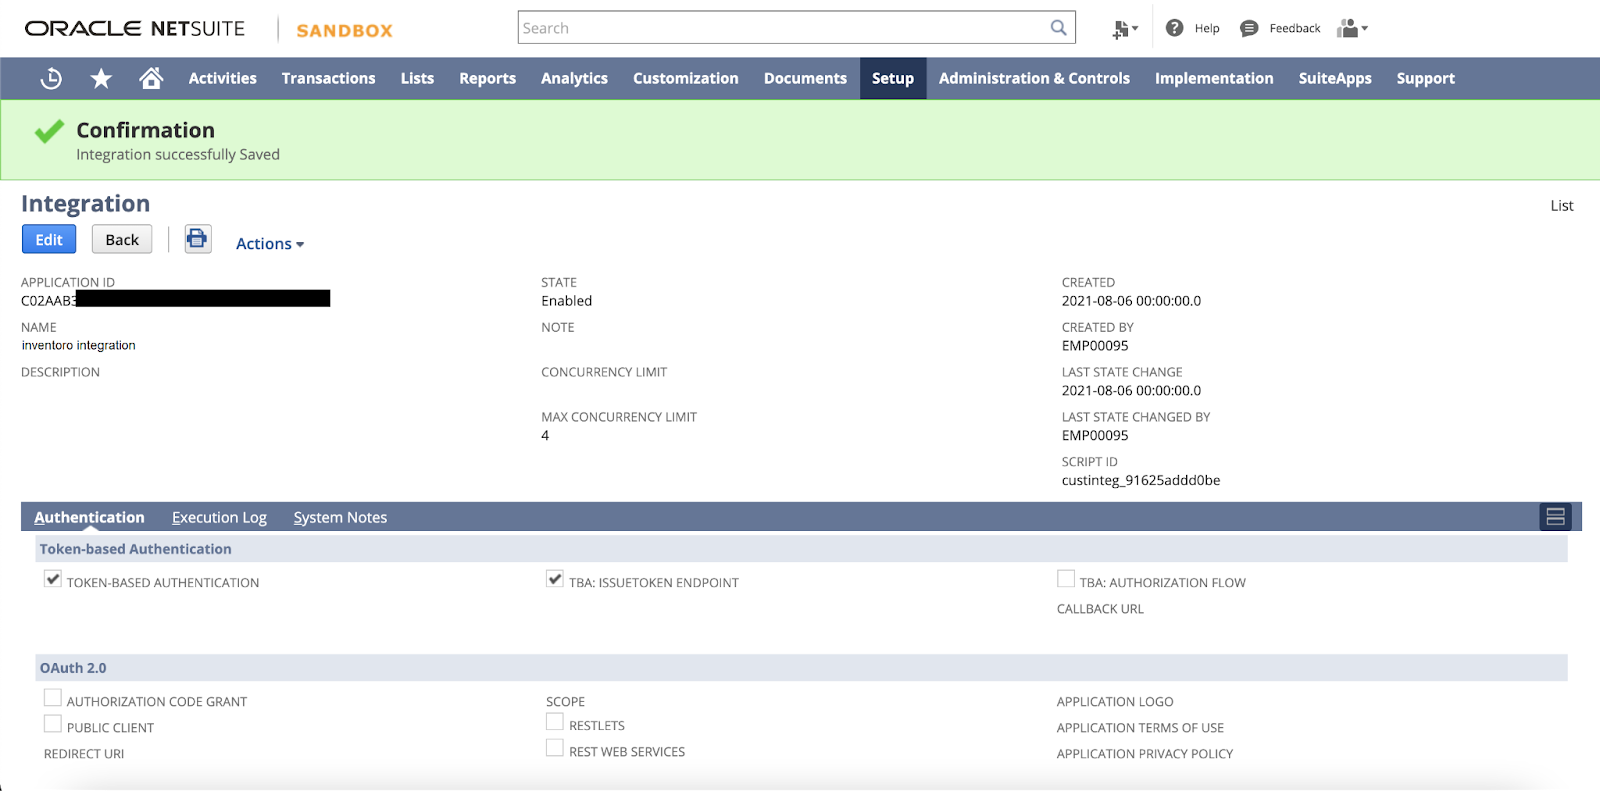
Successfully created Integration Record
Now that your Integration Record is created, scroll down to find your Consumer Key/Secret Pair
Your Consumer Key/Secret Pair is only displayed once! Make sure to save it from this screen, or else you will have to generate a new key pair.
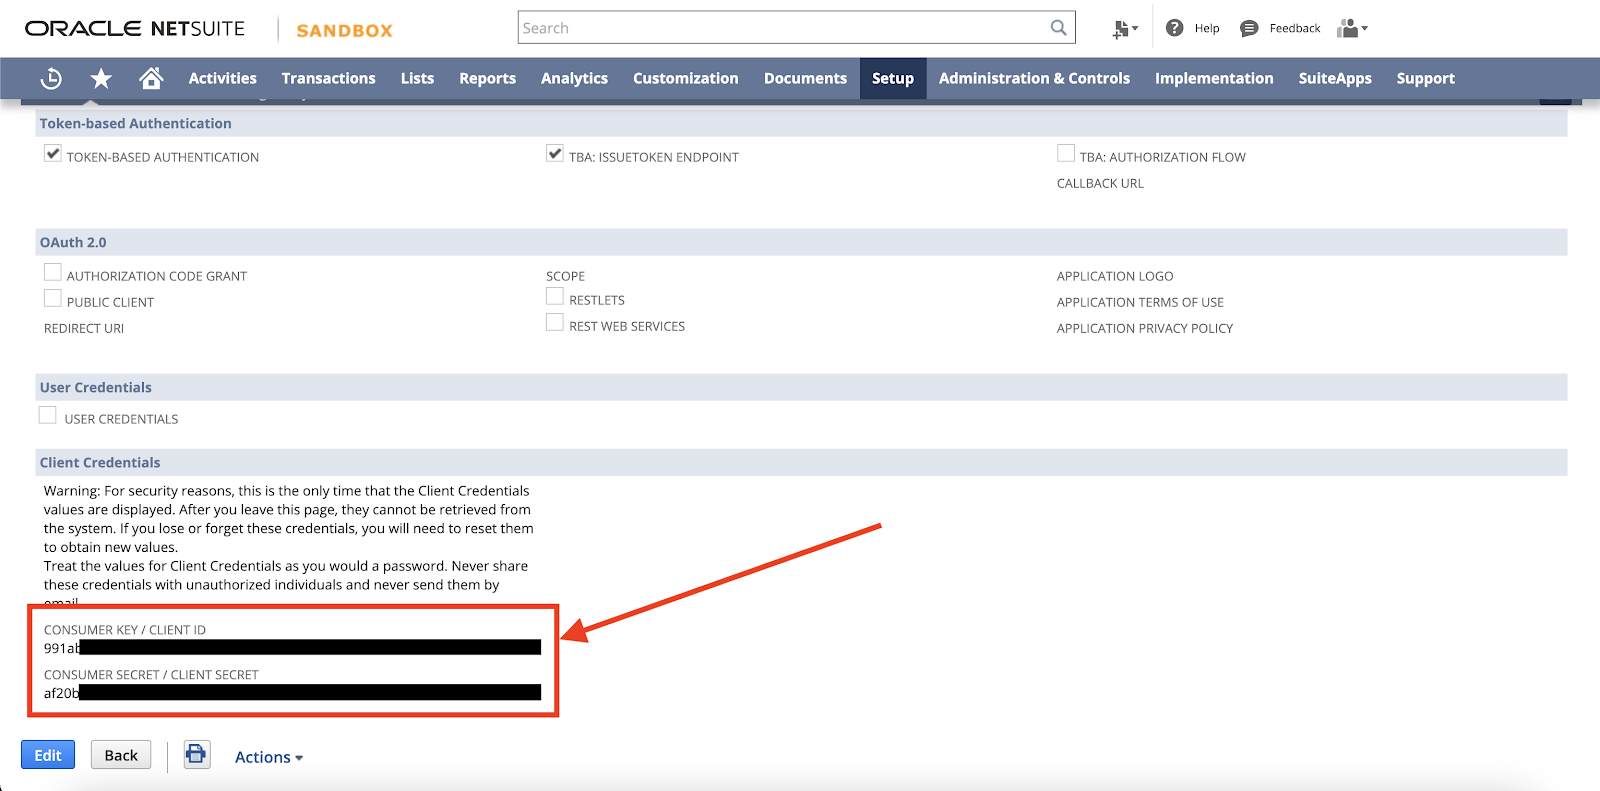
Integration Record Consumer Key/Secret Pair
III. Get the Access Token Key/Secret Pair
The next step is to generate an Access Token Key/Secret Pair – to do this will need to create an Integration Role and assign it to a User.
Create the Role
Head to Setup > Users/Roles > Manage Roles > New

Setup > Users/Roles > Manage Roles > New
On the new role page choose a name for your integration role
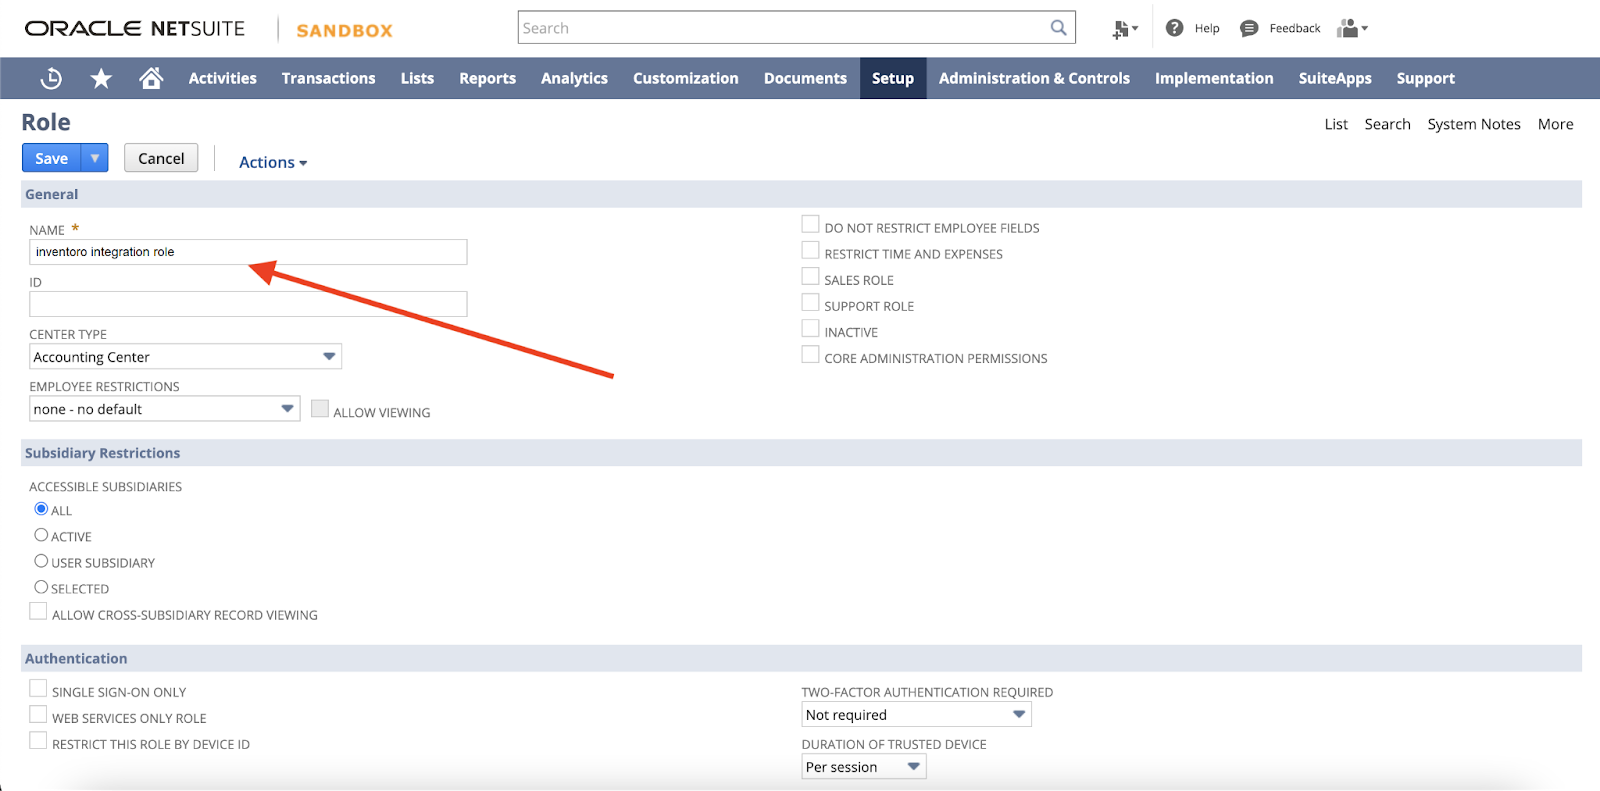
Name the Integration Role
Now you can configure the minimum permissions:
Setup - User Access Token (Full)
Setup - SOAP Web Services (Full)
Setup - Login using Access Tokens (Full)
Setup - Integration Application (Full)
Setup - REST Web Services (Full)
Setup - Access Token Management (Full)
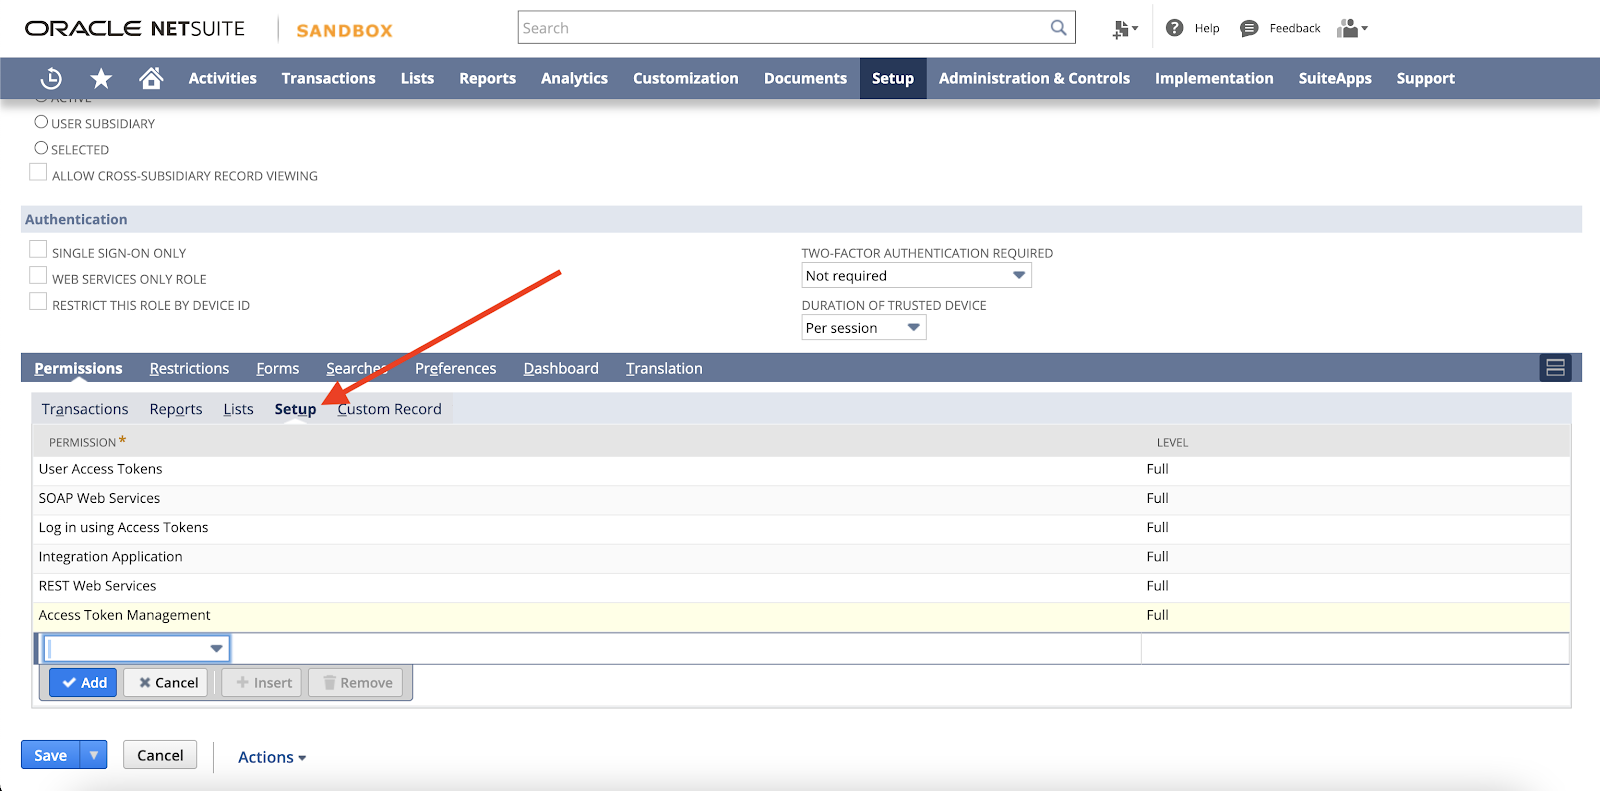
Add minimum permissions to use the API
Add the permissions you need to access relevant data in the Transactions, Reports, and Lists sections. See a full list of available objects in the NetSuite docs
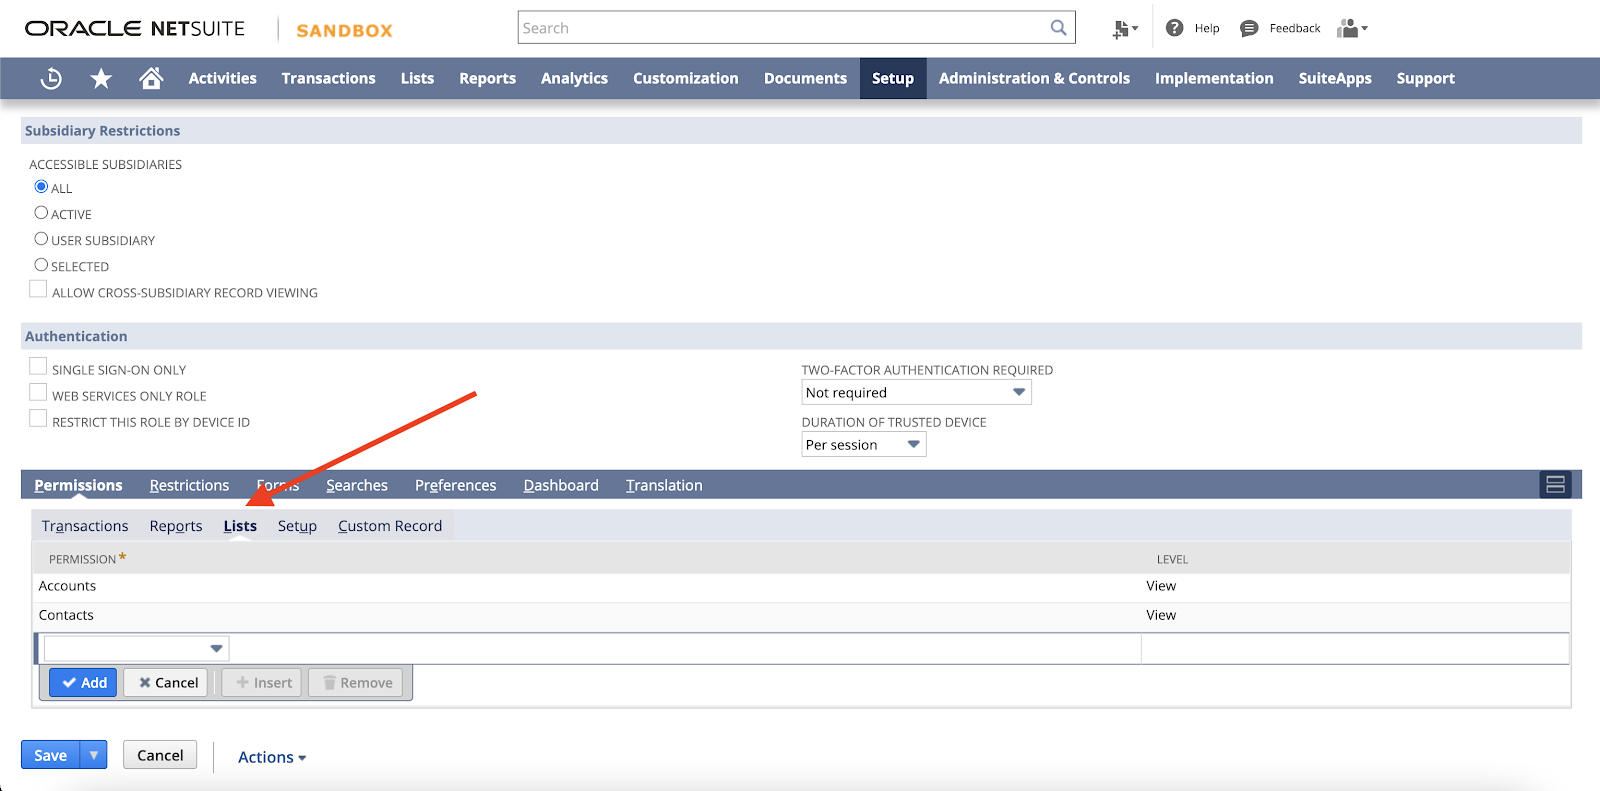
Permissions to access specific objects
Once you're ready, press Save
Assign the Role to a User
If you would like to create a new User for the Integration, head to Lists > Employees > Employees > New

Lists > Employees > Employees > New
Alternatively, if you already have a User you'd like to use ready, head to Lists > Employees > Employees > Search and open the user.
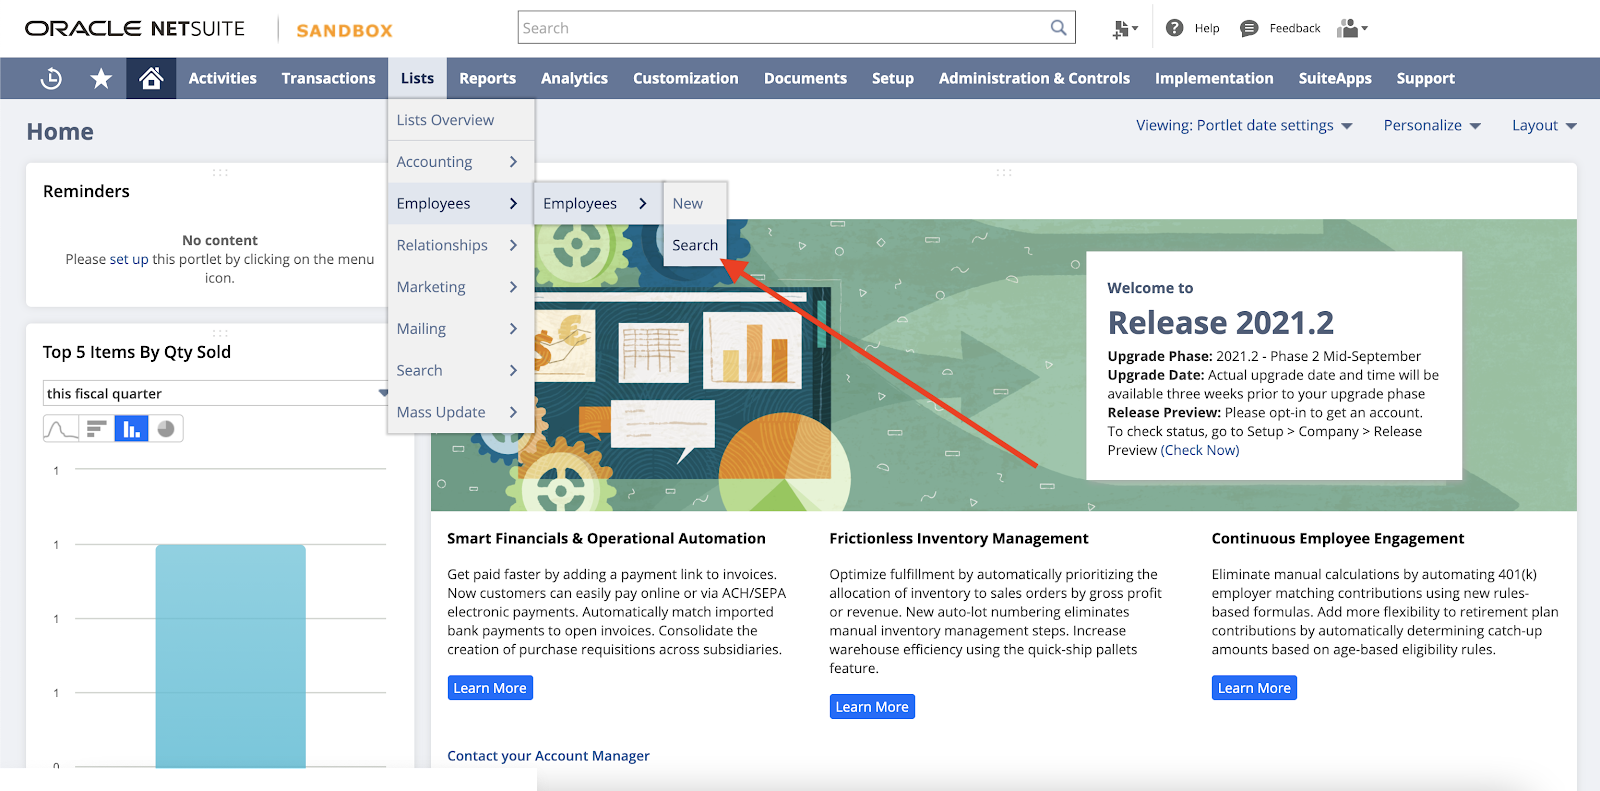
Lists > Employees > Employees > Search
Once you have opened the relevant user, and select Edit

Edit Employee
Scroll down to the Access > Roles tab, and add our new Integration Role to the list
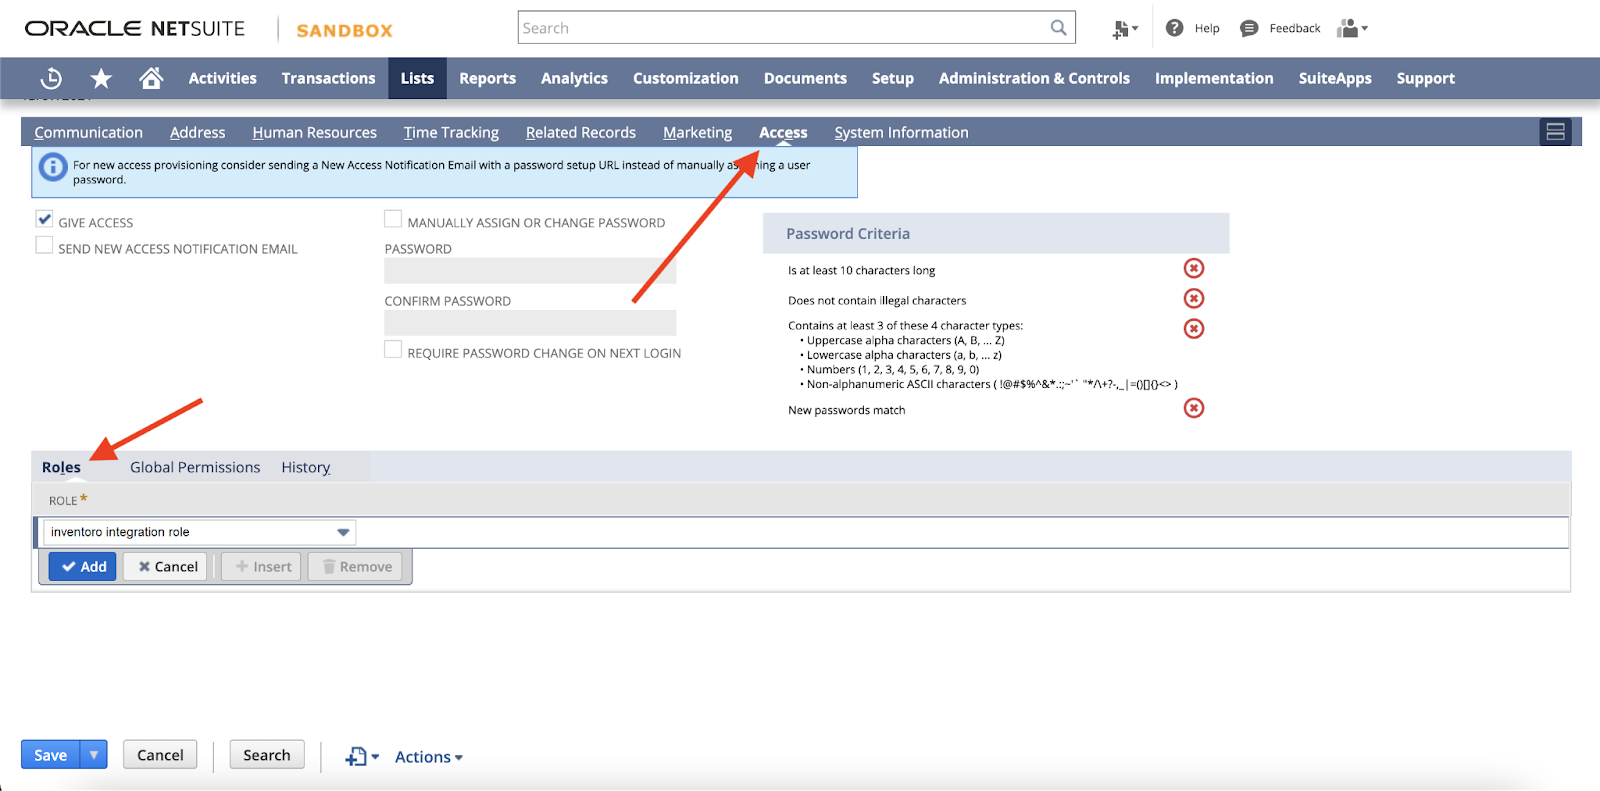
Add Integration Role to User
Press Save
Generate the Access Token Key/Secret Pair
The final step is to generate the Access Token Key/Secret Pair for the User.
Head to Setup > Users/Roles > Access Tokens > New
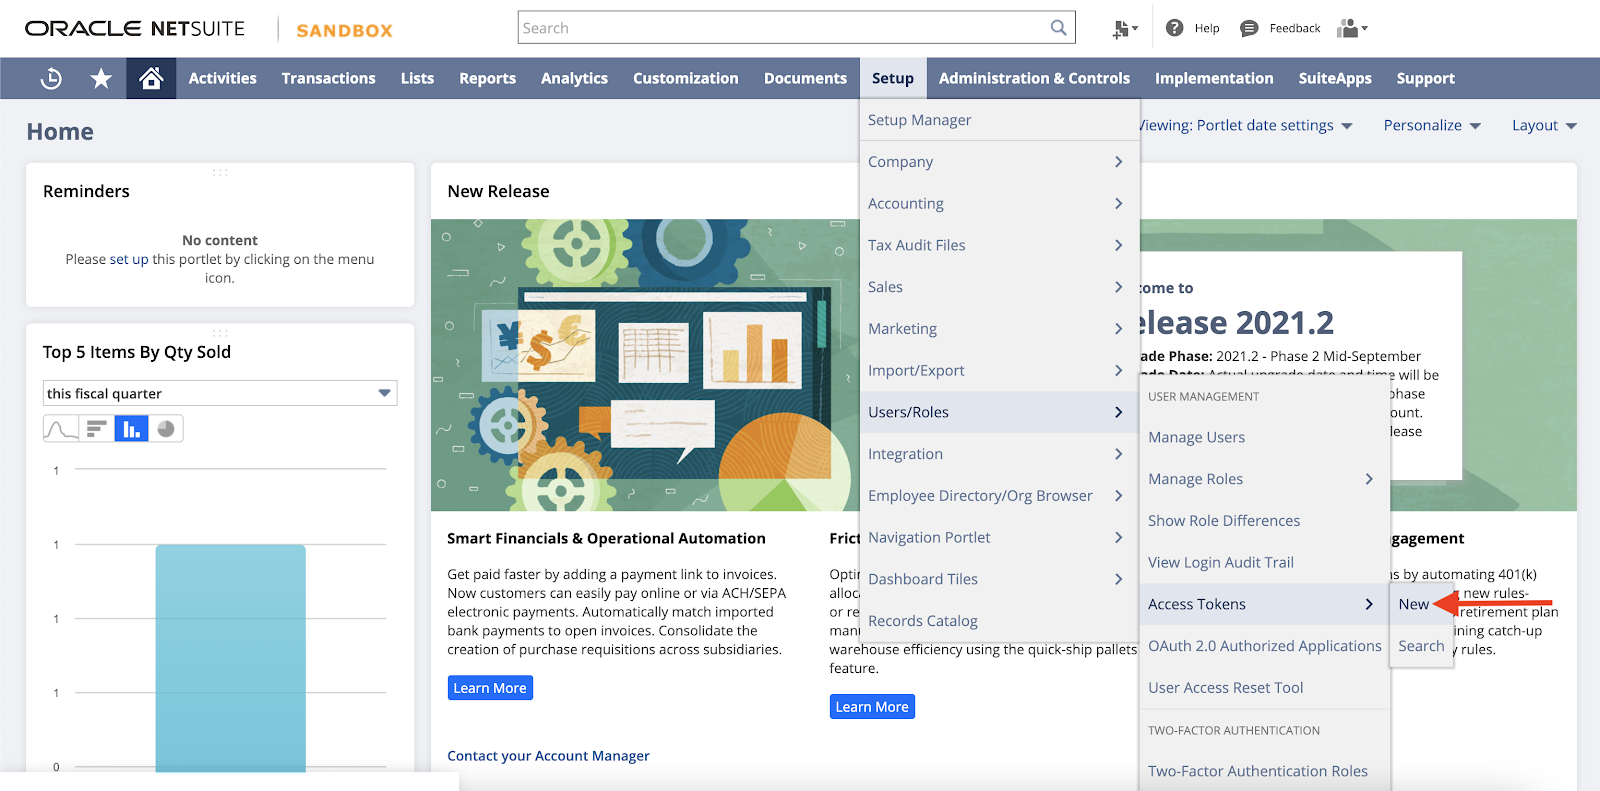
Setup > Users/Roles > Access Tokens > New
On the Access Token page, select the Integration Record (Application Name), User, and Role we just setup
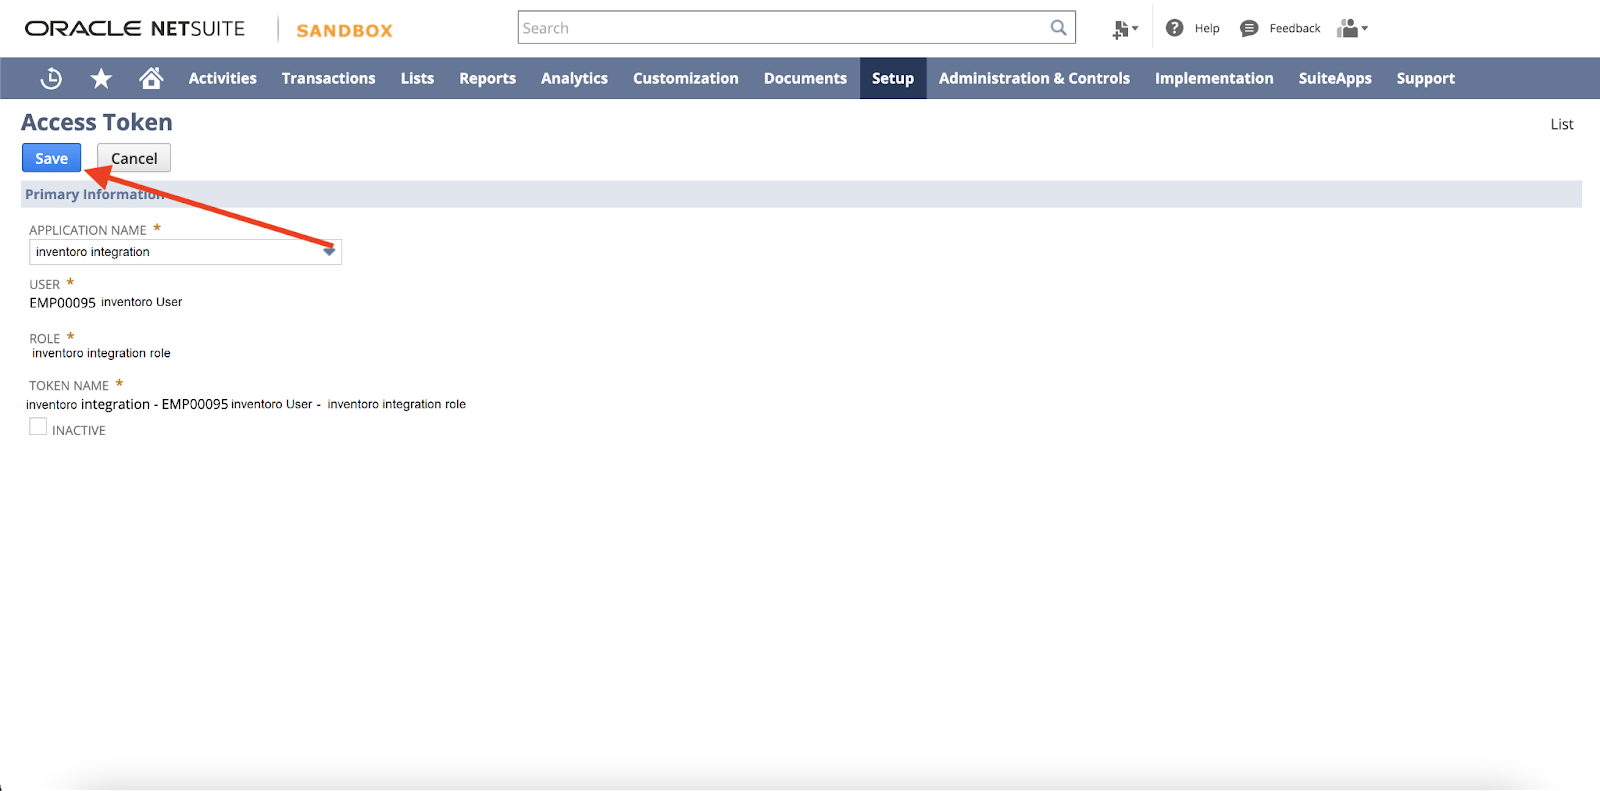
Access Token Page
Once configured, press Save. You will see your Token Id/Secret Pair at the bottom of the page:

Access Token/Secret Pair
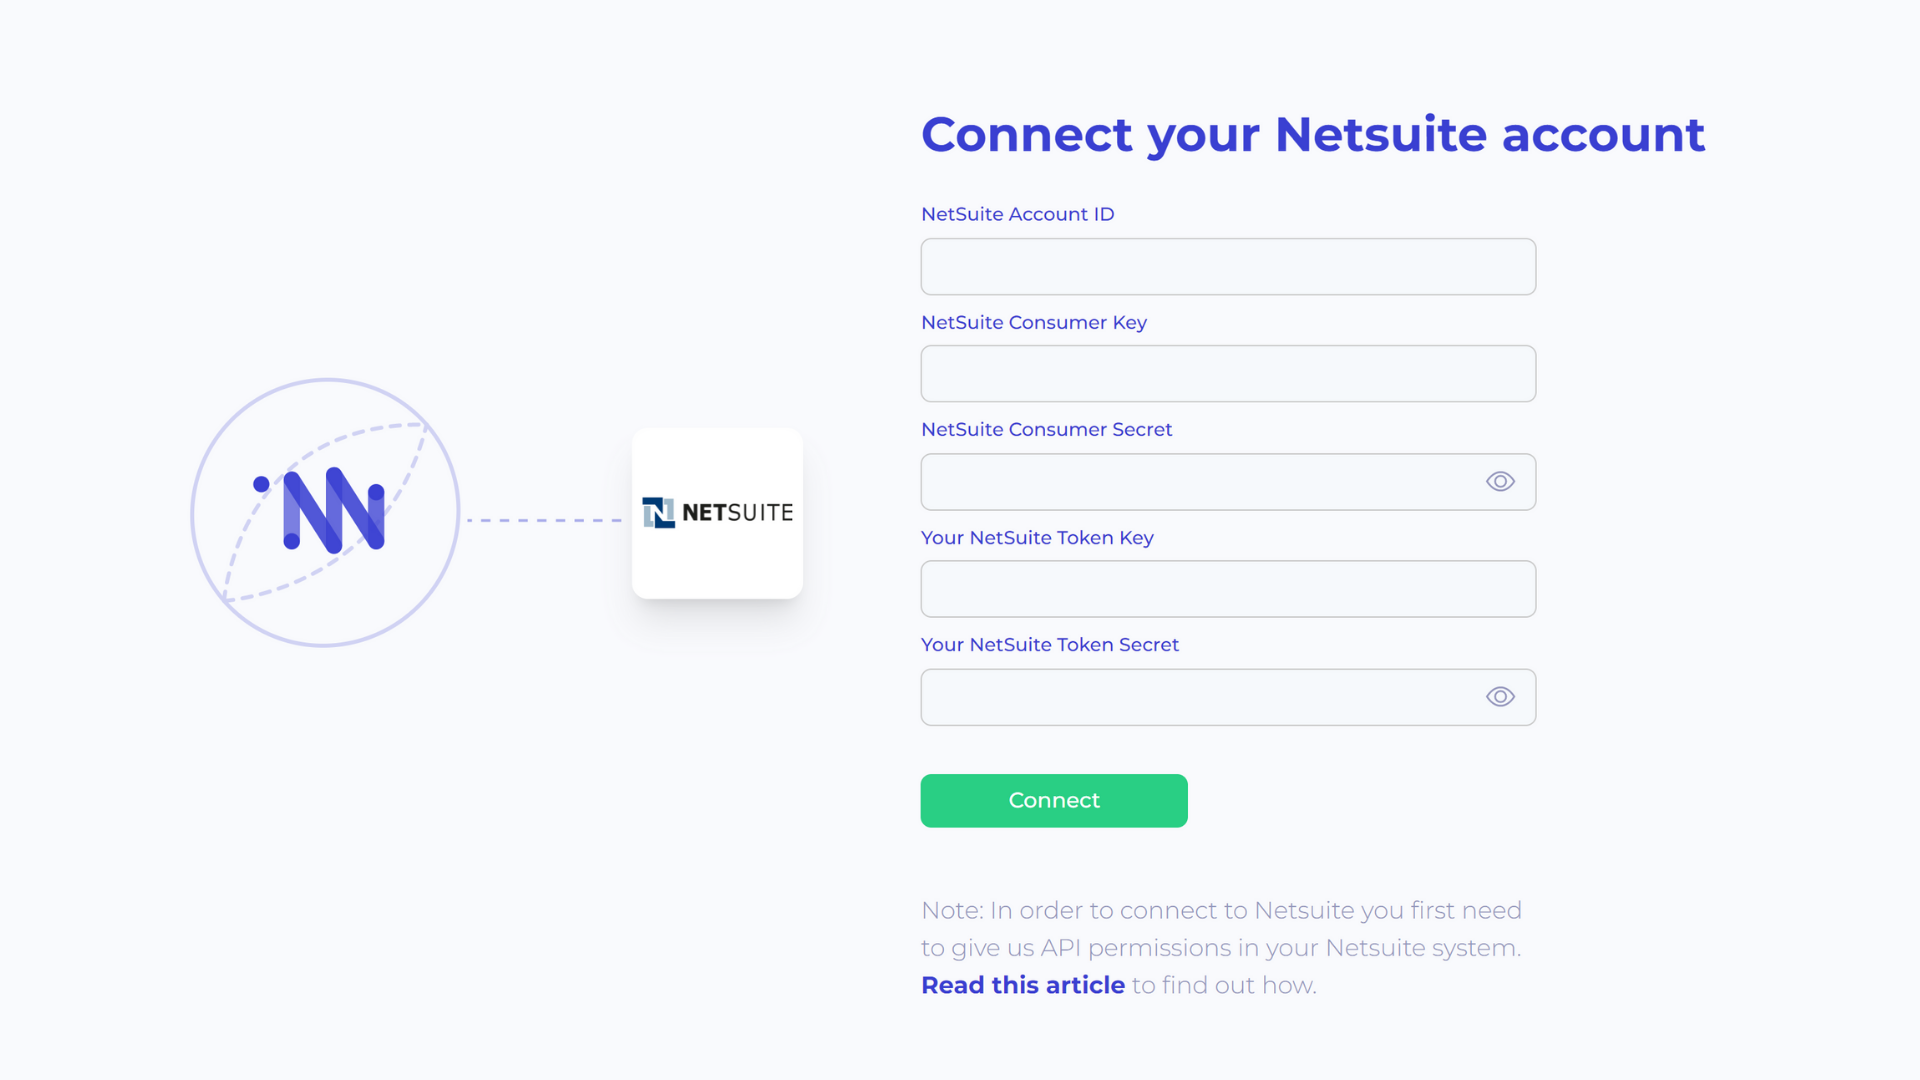
III. Task - Connect NetSuite to Inventoro
1. Go back to the Inventoro app and click Connect at the top right corner of your screen. Choose NetSuite, fill in your NetSuite Account ID, NetSuite Consumer Key, NetSuite Consumer Secret, Your NetSuite Token Key, Your NetSuite Token Secret:
2. Click Connect and then have a cup of coffee, we do the rest.
That's all that needs to be done. After the connection is set up please allow up to several hours before your data actually appears in the Inventoro app. Basically, we need to import your data and calculate sales forecasts and optimum purchase order proposals. This is a large computation operation and takes some time. Once Inventoro will be ready you'll receive an email.
Good luck!